How to Create a Sales OrderUpdated 2 months ago
Preliminary Checks
- Warranty Replacement or Exchange:
- Confirm the original item being replaced has been received by checking the RMA status. It should show as "Pending Refund".
- Ensure that neither a replacement nor a refund has been processed before proceeding.
- Reshipment for RTS, Lost Package, Missing Items, etc.:
- Ensure that the corresponding processes or approvals have been followed and documented accordingly.
Sales Order Creation
- Click the button with the ‘+' symbol and select “Sales Order".

Complete the Following Sections
Primary Information
- Custom Form: The form will autopopulate to the Sales Orders - Therabody - Standard Sales Order. It is extremely important that the correct form is selected.
- Customer: Select the appropriate account.
- Third-Party Retail Purchase, Gift, or Therabody Reset/Retailer Store Account:
- 1998689274 ANZ B2C - Warranty Processing
- 1998689278 Canada B2C - Warranty Processing
- 1998689282 EMEA International B2C - Warranty Processing
- 1998689288 UK International B2C - Warranty Processing
- 1998689290 US B2C - Warranty Processing
- Dotcom Purchase (Therabody.com or Amazon.com):
- theragun-anz: Moduslink Australia B2C
- theragun-uk: Moduslink JCS INTL B2C Orders
- theragun-eu: Moduslink Venray B2C
- theragun-us: TelAdvance
- theragun-ca: Paragon Bay Warehouse (TIL)
- Amazon Orders: Select the “Amazon” account by typing in “Amazon” followed by the country/region (us, ca, uk, anz, de, fr, es...).
- Third-Party Retail Purchase, Gift, or Therabody Reset/Retailer Store Account:
- PO#: Enter the order number being replaced, including a '-#' to indicate the replacement order (e.g., US2388888812345-R001 for the first replacement).
- If the order was purchased from a retailer, use the retailer's order number. If unavailable, use the Case number related to the request.
Classification
- Return Authorization Type: Select if appropriate.
- Return Reason: Select if appropriate.
Sublists
- Item:
- Enter the SKU of the item being replaced.
- While still on the item line, scroll to the right and select the following:
- Location: Select the warehouse where the item will be shipped.
- Discount Reason: Select the appropriate option from the dropdown.
- Click ‘Add’.
- Repeat the process above until all items being replaced have been added to the Sales Order.
- Under ‘Discount Item’, select Warranty: B2C Customer NEW - This is specifically for zeroing out replacement (SO).
- Under ‘Rate’, enter “–100%”.

Shipping
- Shipping Method:
- US Shipments: FedEx Home Delivery.
- If expedited shipping is necessary, select ‘FedEx 2 Day’ and reach out to the warehouse requesting that the shipment is expedited.
- CA, EU, UK, ANZ Shipments: Standard.
- US Shipments: FedEx Home Delivery.
- Ship to Select:
- Hover over the dropdown box and select the ‘+’ to enter the customer’s shipping information in the new pop-up window.
- Label: Customer Name & Last Name.
- Addressee: Customer Name & Last Name.
- Attention: Customer Name & Last Name.
- Phone.
- Address 1: Building or house number and street name.
- Address 2: If applicable, secondary address information such as numbers for apartments, suites, PO Boxes, etc.
- City: Fill it in for all locales.
- State: Fill it in for US, CA, and ANZ only.
- If an EU/UK Sales Order contains this information, the order won't flow correctly.
- Zip Code.
- Email Address.
Billing
- Hover over the dropdown box and select the ‘+’ to enter the customer’s billing information in the new pop-up window.
- Label: Customer Name & Last Name.
- Addressee: Customer Name & Last Name.
- Attention: Customer Name & Last Name.
- Phone.
- Address 1: Building or house number and street name.
- Address 2: If applicable, secondary address information such as numbers for apartments, suites, PO Boxes, etc.
- City: Fill it in for all locales.
- State: Fill it in for US, CA, and ANZ only.
- If an EU/UK Sales Order contains this information, the order won't flow correctly.
- Zip Code.
- Email Address.
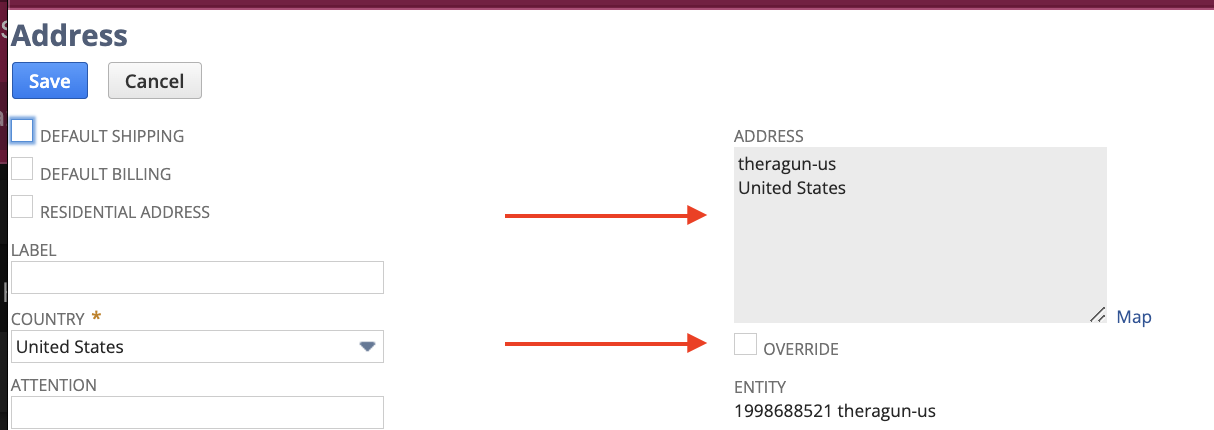
Note: When entering an EU, UK, or ANZ address, it can be entered in the box by selecting the ‘Override’ checkbox.
Final Check and Save
- Double-check all input details on the Sales Order.
- Click 'Save' once satisfied with the accuracy of the information.